Inviting team members and access groups
Outcome
Your teammate will have an accepted RoleSage invitation and only the employer, team, and workflow access they need.
Before you start
- Use the teammate's current work email address.
- Decide which team they belong to and which tasks they must perform.
- You need permission to view employer users and invite new users.
Understand access groups
Access groups control which employer features and data a team member can use. A user can belong to more than one group.
Groups may control access to areas such as:
- users and team administration;
- employer settings;
- roles and openings;
- billing;
- context prompts;
- applicant and interview workflows.
Who appears in Users
Users shows members of your current company. Applying to one of your openings does not make someone a company user. Candidates remain in the applicant workflows unless they also have a company membership.
The list uses the same company permissions for every viewer. If you cannot open it, ask your company admin to check your access groups. Restoring access from this page restores an employer user; assign the required groups from their user details afterwards.
Inviting a teammate
- Open Users from the employer navigation.
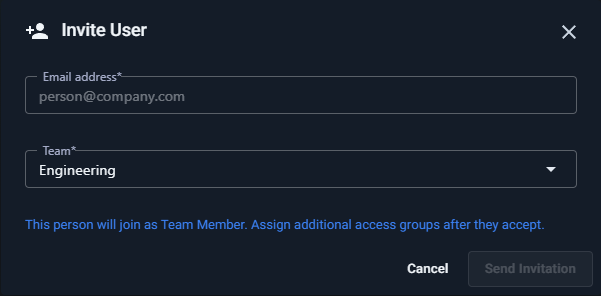
- Select Invite User.
- Enter the teammate's work email address and choose their team.
- Send the invitation.
- After they accept and sign in, open their user record.
- Assign the access group or groups they need.
Check the result
Ask the teammate to sign in and confirm that they can see the expected Role, Opening, applicant, interview, or administration area. Also confirm that restricted areas remain unavailable when they are not needed.
Good permission practice
Give people the access they need for their work, not blanket admin access by default. Add billing or employer-admin permissions only when the person needs those areas.
Next step
If a teammate cannot see an opening, see Colleague cannot see an opening.